How to Make Tackless Kid Bulletin Boards – 5 Cute Kid and Toddler-Safe Cork Board Alternatives

Keep your little one safe with this cute toddler-safe bulletin board that doesn’t require pins, is easy and fun to make, and can be made by repurposing an old cork board.
Rule no. 1 of raising small kids: Keep sharp and pointy objects away from them. So tacks are out, safety is key. Check out what I made, a safe alternative to push pins, and many other ideas to inspire you.
I have to confess that I’ve given my child tacks for her desk bulletin board and later almost stepped on them. This was a signal that perhaps the people who write such pearls of wisdom as “keep out of reach of children” for a living are not just full of it. So I took away the tacks.
And then somebody-who-shall-remain-nameless scribbled on the corkboard, which of course absorbed the ink like rain falling on the Atacama Desert. So, off to the interwebs for some safety bulletin board ideas…
But, before, this is what I did:
How to make a safety bulletin board for kids
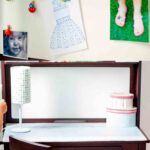
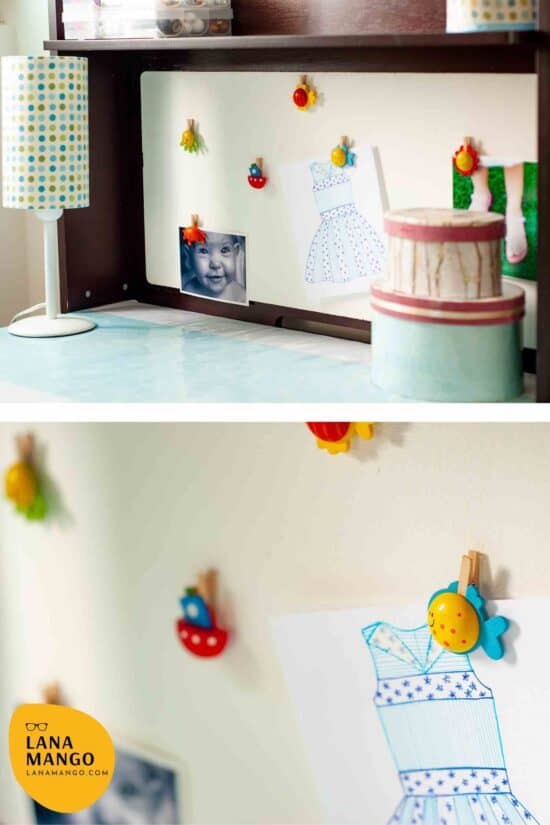
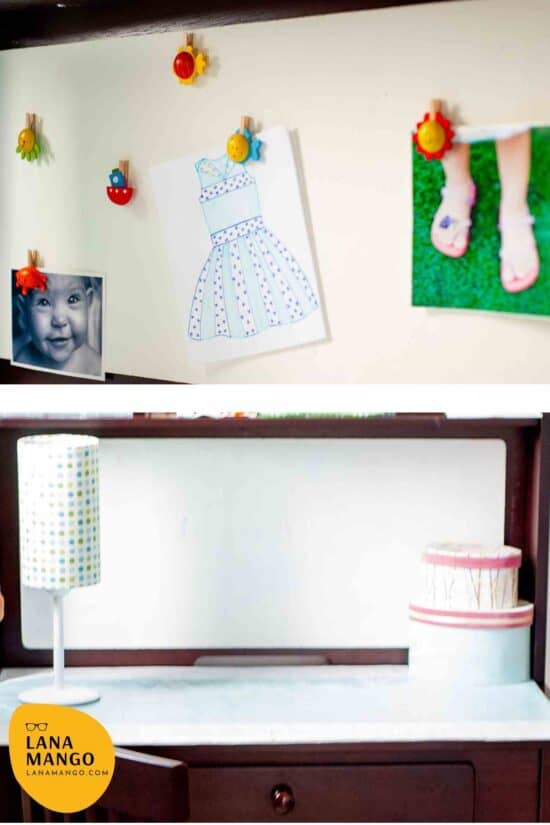
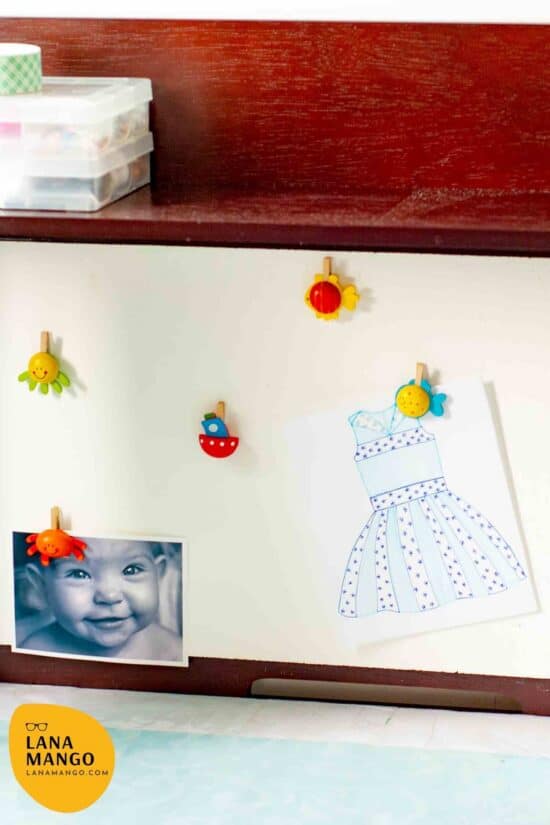
- I painted the old corkboard: First, I gave it a coat of primer to block the stains from bleeding through, and to help with adhesion. Then, a coat of white chalk paint (I always have some at hand, great stuff). I then sealed it with a coat of water-based satin poly to prevent little fingers from staining it again.
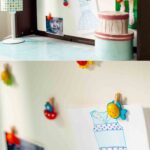
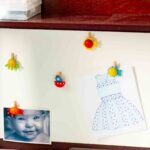
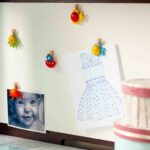
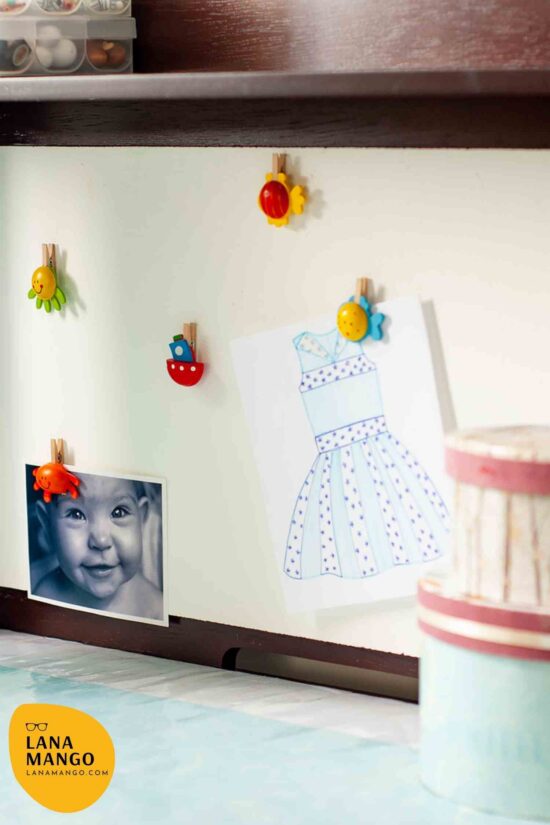
- I glued the pins: I then glued cute pins on the board, so now we can hang things without having to use pointy bits of metal. You can see some great choices below:
Cute pins for a tackless toddlers bulletin board
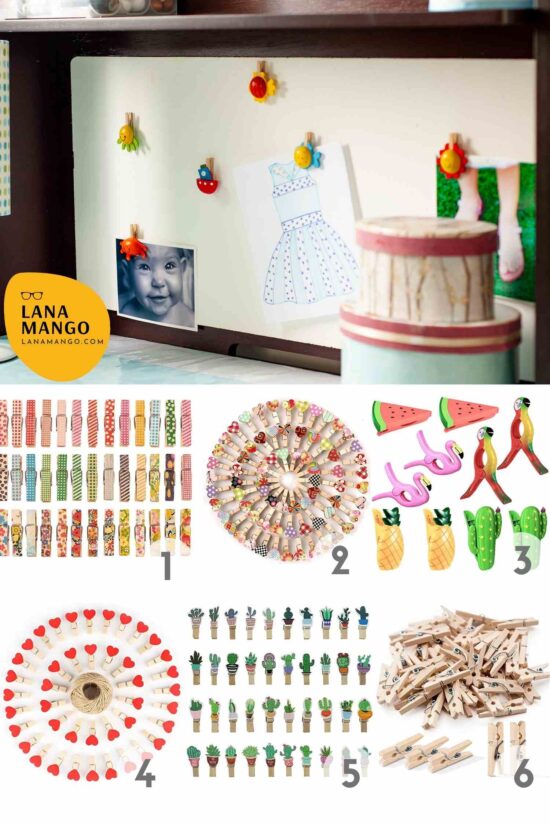
Buy them:
- Painted wood clothespins
- Patterned heart wooden clothespins
- Tropical pins
- Red hearts clothespins
- Succulents and cacti clothespins
- Plain wooden clothespins (to decorate yourself)
More safe safety bulletin board ideas
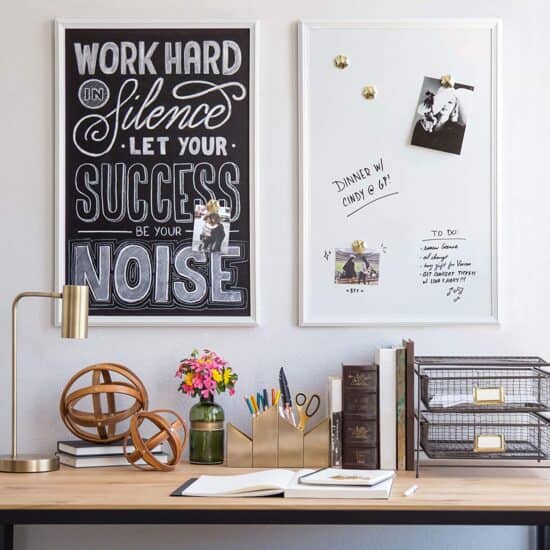
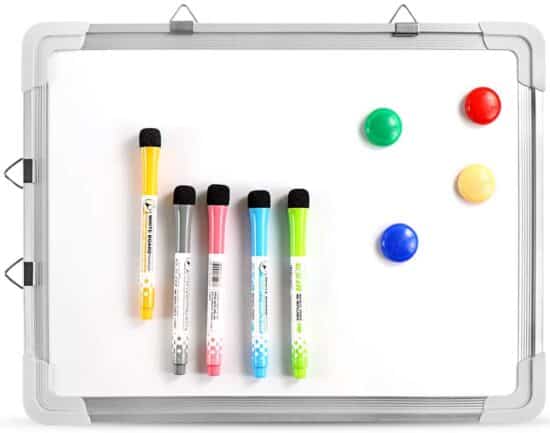
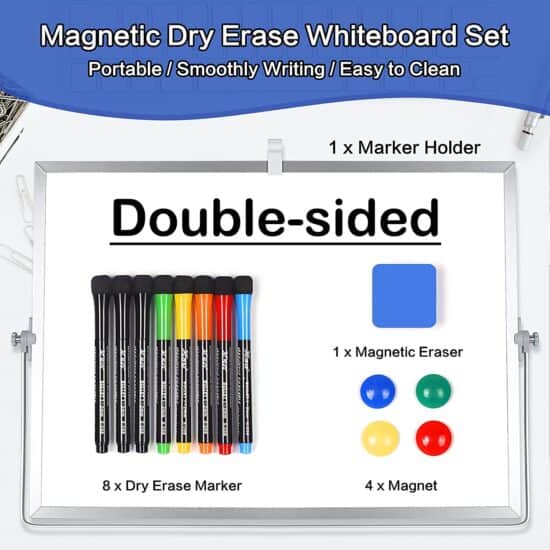
The second best idea for a tack-less, no pin bulletin board is magnetic and dry erase. Magnetic has the advantage that you can tack anything onto it.
Make sure that all these things are big enough that a child cannot swallow it. Safety above all.
Don’t miss this other fabric-covered bulletin board that I made.